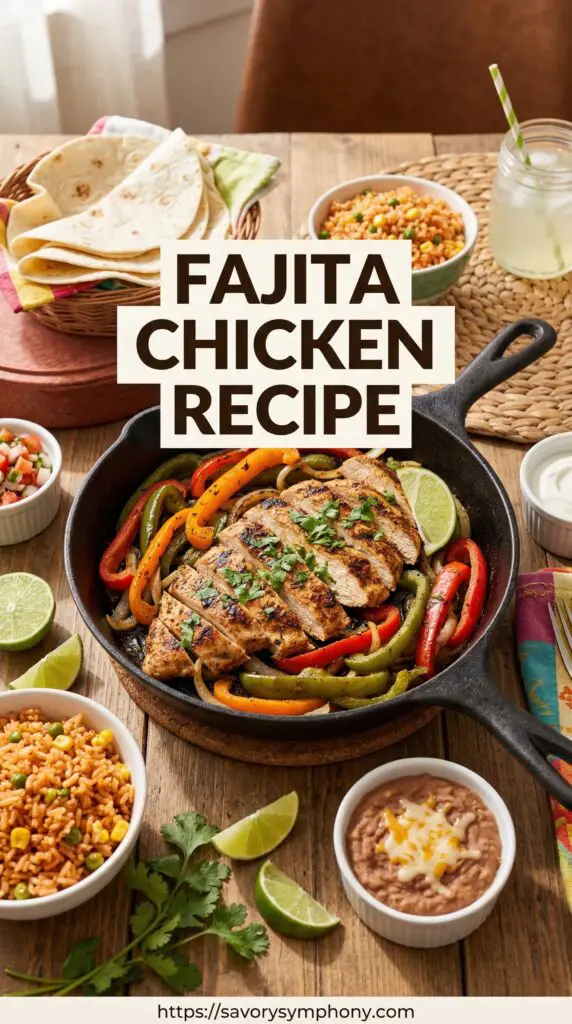
🐓 Chicken Breasts vs. Chicken Thighs — The Eternal Debate
Okay, unpopular opinion incoming: chicken thighs are better for fajitas. There. I said it.
Don’t get me wrong — chicken breasts are the classic choice and they’re totally fine when done right. But they dry out fast if you’re even slightly distracted (and we all know how distracting Instagram can be while cooking). Chicken thighs, on the other hand, have more fat, more flavor, and they’re way more forgiving if you overcook them a tiny bit. They’re basically the “easy mode” of fajita cooking.
That said, if you’re making a chicken recipe for salad-style fajita bowls or want to keep things lean, go with breasts. They’re great sliced thin over greens!
🫑 Your Veggie Game Plan
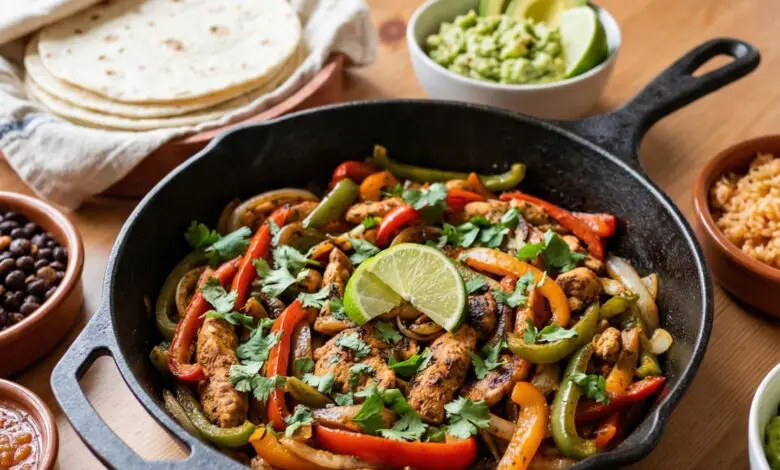
Everyone knows the classic bell pepper + onion combo — and yes, it’s a classic for a reason. But here’s a little restaurant secret: add mushrooms. Portobello or cremini mushrooms soak up all that marinade and get this incredible earthy, meaty flavor that takes your fajitas from “pretty good” to “wait, did you make this yourself?!” level. Give it a shot — you’ll thank me later.
🌶️ The Spice Mix That Beats the Store-Bought Packet Every Time
Please, please step away from the seasoning packet. I know it’s convenient, but homemade spice blends are SO much better and honestly take like 2 minutes to mix up. Here’s what you need:
- Chili powder
- Cumin (the soul of Tex-Mex cooking)
- Smoked paprika (this is where the magic happens — that subtle smokiness is everything)
- Garlic powder & onion powder
- Mexican oregano (earthier and more citrusy than regular oregano — worth finding!)
🔥 The Liquid Smoke Hack Nobody Talks About
No grill? No backyard? No problem. Add just a teaspoon of liquid smoke to your marinade and boom — you’ve got that charcoal-grilled flavor without ever stepping outside. It sounds like cheating, and honestly, it kind of is. But your fajitas will taste like they came off a proper outdoor grill, and that’s all that matters. 😄
👨🍳 IV. Let’s Actually Cook These Bad Boys — Step by Step
Step 1: Slice It Right
If you’ve got thick chicken breasts, slice them horizontally to make thinner “cutlets” before cooking. This little move ensures everything cooks evenly — no more raw-in-the-middle, burnt-on-the-outside disasters. We’ve all had one of those. Never again!
Step 2: Get That Pan SERIOUSLY Hot
Grab your cast iron skillet (if you don’t have one, get one — it’s the best investment you’ll ever make in your kitchen, no exaggeration). Get it ripping hot before the chicken ever touches the surface. This is what creates that gorgeous golden sear on the outside while keeping the inside juicy. If your pan isn’t hot enough, the chicken will just steam and go grey. Sad grey chicken is NOT the goal here.
Step 3: The Sizzle Hack 🎭
Want that dramatic restaurant moment at your own table? Easy! Right before you serve, squeeze half a lime directly over the hot skillet. It’ll hit the pan and create this incredible sizzle and a cloud of citrusy steam that smells absolutely amazing. Your family or guests will be genuinely impressed. Works every time, I promise.
Step 4: LET. IT. REST. (Seriously!)
This is the step everyone skips and then wonders why their chicken is dry. After cooking, let your chicken chill on a plate for 5-10 minutes before you slice into it. Those few minutes let all the juices redistribute back through the meat instead of running all over your cutting board. Skip this step and you’ll literally watch all your hard work pool onto the counter. Not ideal!